With Oracle HRMS, you can manage your entire recruitment cycle, from Recruitment Preparation, to Selection Processing and finally, Appointment.
Recruitment Preparation
Raising a Requisition for a Vacancy:
Use the Requisition and Vacancy window to record requisitions, vacancies, and openings within your enterprise. A requisition can be for one or more vacancies, and a vacancy can have one or more openings.
To Enter Requisition
Step1
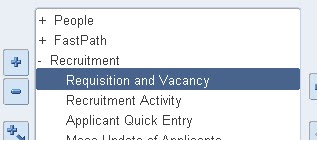
Open the given navigation to Raise Requisition and Vacancy
(N) Recruitment > Requisition and Vacancy
Step2
Create a Requisition by entering:
Requisition Name, Description, Date and Raised By Details of the Requisition.

Step 3
After entering the requisition save your work before you begin to define the vacancy.
Application users should create an internal standard for naming Vacancies created in this form for searching created vacancies later.
1. Enter the Name of the Vacancy and optionally enter description.
2. Enter a name and number of openings for the vacancy.
3. Optionally enter a description and select a status.
4. You can select one or more assignment components to define the vacancy.
5. Optionally enter the name of the recruiter.
Use the Recruitment Activity window to define either single recruitment activities or groups of activities. You can associate a recruitment activity with an organization and with one or more vacancies. You can record and monitor the cost effectiveness of any activity, or group of activities.
Step1
Open the form by performing the following navigation.
(N) Recruitment > Recruitment Activity
To define Recruitment Activity:
1. Enter the details of the recruitment activity.
2. Choose the Recruiting For button to select one or more vacancies to associate with the activity.
Step2
Enter the Recruitment Activity Detail in this Form.

Step3
To select the Vacancy click on Recruiting For Button.


Use the View Vacancies window to see lists of vacancies for an organization, location, job, position, grade, group, recruiter, or recruitment activity. You can also see all vacancies of a particular status.
To view vacancies:
Enter selection criteria in any of the fields in the top half of the window.
Leave all these fields blank to see all vacancies in your Business Group.
Leave all these fields blank to see all vacancies in your Business Group.
The Initial field shows the number of openings recorded in the vacancy. The Current field shows the number of unfilled openings at your effective date (that is, Initial minus number of employees hired into the vacancy).
Step1
Open the form by performing the following navigation.
(N) View > Vacancies
Step2
Enter the Requisition Name to view all Vacancies raised by this requisition.
(N) View > Vacancies

Recording an Application Quickly
Use the Applicant Entry window to enter basic employee information and one assignment for an application.
If you need to update this information or add further information, use the People and Application windows.
To Record an Application Quickly:
1. Enter the applicant's name and an identifying number recognized by the system.
Note: If your Business Group uses automatic number generation, the applicant number automatically displays when you save your entries in this window.
2. Select a status for the application. By default a new application has the status Active Application (or an equivalent user status defined on your system). All other fields are optional.
3. To enter an address, select a national address style. (Bangladesh)
A window opens with the address format for the country you select. Enter the address lines and choose OK.
4. The Date Received defaults to your effective date, but you can change it. This is the date the applicant's record will begin.
5. You can enter the name of the applicant's current employer.
6. You can select a recruitment activity. If there is only one vacancy for the activity, the vacancy details appear automatically.
7. If you select a vacancy, applicant assignment information is displayed from the vacancy record. You can add to this information or change it. However, if you change it, the vacancy field clears.
8. If you do not select a vacancy, you can enter assignment information in the Vacancy Applied For region. If you do not enter an organization, it defaults to the Business Group.
Step1
Enter Applicant data by this form.
(N) Recruitment > Applicant Quick Entry

You query and update groups of applicant assignments using the Mass Update of Applicants window.
To update a group of Applicant Assignments:
1. Select Find from the Query menu to open the Find Applications window. Enter selection criteria for the group of applicants you want to update and choose the Find button.
2. Do one of the following:
If you want to update all or most of these applicant assignments, choose the Select All button. Then uncheck the Mark check box for any assignments that you do not want to update.
3. Choose the Update button.
4. In the Update window:
If you want to update the status of the selected assignments, select the new status.
If you want to refer these applicants to a new recruiter, select the name of the Recruiter.
5. Choose OK to affect the update.
Step1
Follow this Navigation To Update Applicant’s Status.
(N) Recruitment > Mass Update of Applicants
Step2
To Update Applicant’s Status open this form.
(N) Recruitment > Mass Update of Applicants

(N) Recruitment > Mass Update of Applicants

Step3
To update the Status of an Applicant Check the Applicant and Click on Update Button.

To hire an applicant:
1. Query the applicant if it does not already appear there.
2. Select Hire Applicant from Action drop down list.
3. Select Employee type (Internee, Permanent, Contract)
Save your work.
Step4
Follow this Navigation To Hire an Applicant.
(N) People > Enter and Maintain
To hire an Applicant enter the Applicant number in the People form and Hire the Applicant and enter all relative data in this form.

Click on Hire Applicant

To hire an Applicant enter the Applicant number in the People form and Hire the Applicant and enter all relative data in this form.

Click on Hire Applicant
